Although it can be difficult, drawing portraits can be enjoyable and gratifying. The best place to start if you want to get better is by practicing drawing facial characteristics. When learning to draw lips, beginners frequently commit two errors. I’ll show you how to steer clear of these blunders and draw realistic lips. This lesson will walk you through seven easy steps to drawing lips that appear natural.
Steps To Draw Realistic Lips
Here are some basic steps to draw realistic lips.
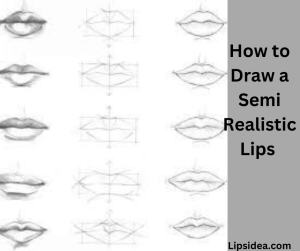
Step 1: Decide the length and height of your drawing
Draw a rectangle to represent the size of the top and bottom lips starting with a 2H pencil. Consider the length and height of the mouth if you are drawing from a photo. This stage is simply to lay up some basic parameters on the page so that we can later begin adding the real shapes.
Step 2: Sketch the simple shapes of the lips
Lightly sketch in three shapes for the top lip and two for the bottom lip to represent the shape of the lips. On the top lip, draw a heart in the center. It will descend just little below the centerline. These patterns reveal the basic contour of the lips.
Step 3: Draw the important angles of the lips
The first error people make when attempting to create a realistic mouth is assuming lips are just composed of curved lines. In reality, the mouth expression is visible from some crucial angles. Looking at the midline between the lips will help you capture their expression. The centerline typically consists of six angles and is shaped like the top lip. If the expression is neutral, smiling, or frowning, it will be clear from how the angles slant up or down.
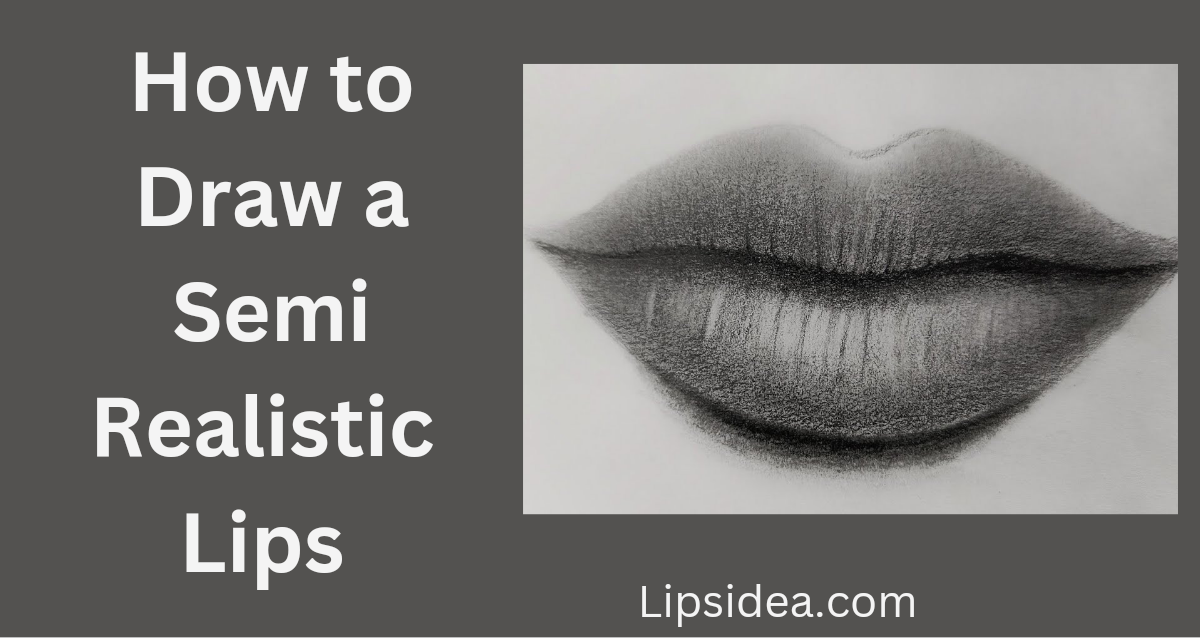
Step 4: Shade the lips
The placement of the light, m iddle, and dark tonal values must be accurate in order to generate the volume of the lips, and this placement may vary depending on where the light source is. On the other hand, if the light is overhead, there will be a reflection (highlight) on the lower lip’s center.
Step 5: Centerline and wrinkle lines
After shading the lips, we will now draw a darker line along the middle of them. A 2B pencil turned on its side will produce a velvety, black mark. The line’s thickness should be changed from thick at the corners to thin, followed by thick at the middle. Include other little details like the top and bottom lip creases. The lips’ wrinkling gradually follows the lip’s natural contour.

Wrapping Up
Place the vertical line closer to the right in order to draw the lips at a 34 angle. A tiny outward bend will be seen in the vertical line. We shall see more of the left side as the top lip’s heart-shaped core protrudes to the right. To finish, adhere to the remaining instructions in the tutorial. So we hope after reading this post you will know how to draw realistic lips.